Email Settings
The Email Settings tab is your design canvas. This is where you transform raw form data into professional, branded communications for your team and customers.
1. Recipient Configuration (To)
Define who receives the notification. You can alert a central team or the individual respondent.
Internal Alerts
Use fixed addresses like sales@company.com to notify your staff every time a form is submitted.
External Receipts
Use a Merge Tag like {{Email Address}} to send a confirmation copy directly to the user.
Video: Setting up Respondent Receipts
Video: Branded Respondent Receipts Guide
2. Subject Line
Make your notifications searchable and organized by including dynamic data in the subject line.
Example Syntax
New Order: {{Order_Number}} - {{Customer_Name}}Branding Canvas
Our Rich Text Editor supports full HTML styling. Add your company logo, custom colors, and professional signatures to every automated email.
3. The Email Body
- Personalize Content: Click a variable in the right sidebar to insert it instantly.
- Dynamic Summaries: Include a full block of all form responses for management review.
- Contextual Links: Add markers like {{EditResponseUrl}} to let recipients modify data.
Pro Tip: Automated Data Summaries
Video: Stop Spreadsheet Hunting with Summaries
4. Advanced Options
Automated Attachments
If your form has file uploads, enable 'Attach Files' to send resumes or receipts as real attachments.
Reply-To Routing
Control where customer replies are sent to keep your team organized.
Deep Dive: Custom Reply-To
Video: Keep Your Inbox Private Guide
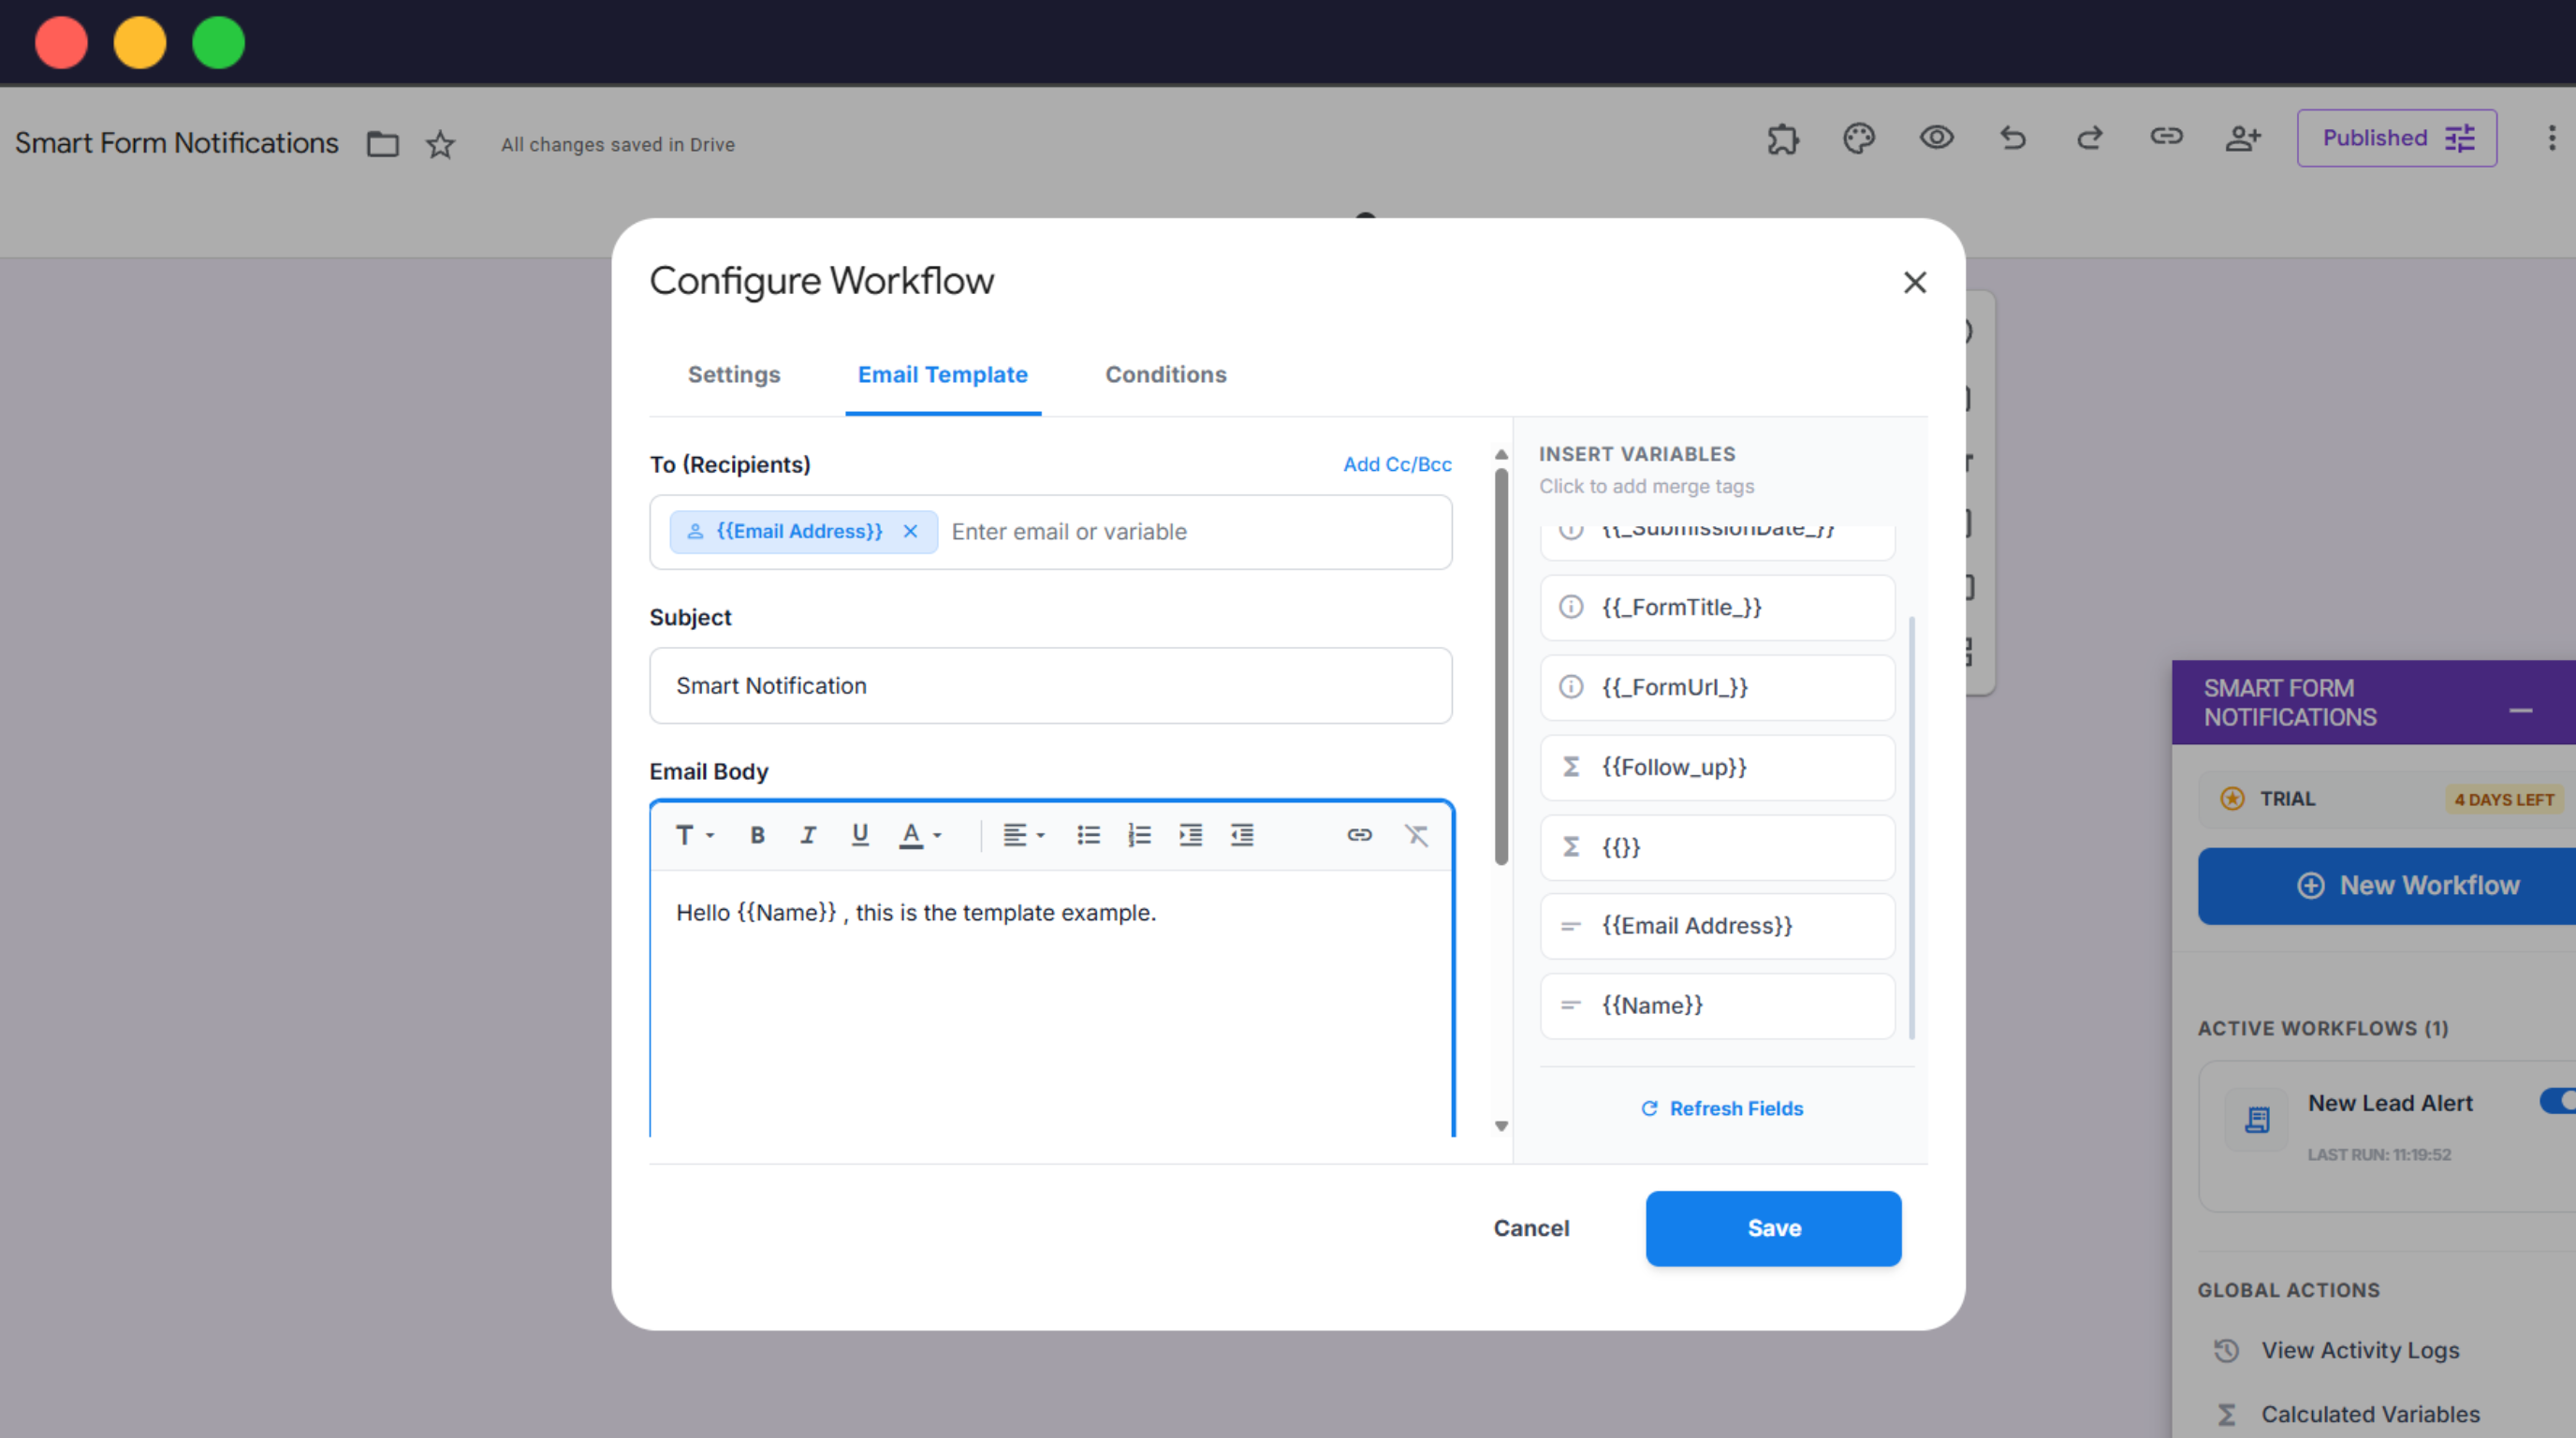
Interface: Workflow Template Editor