Quick Start Guide
Getting Started
Follow this guide to set up your very first automated workflow and move from a blank form to a fully automated notification system.
Video Masterclass
Video: Complete Step-by-Step Tutorial
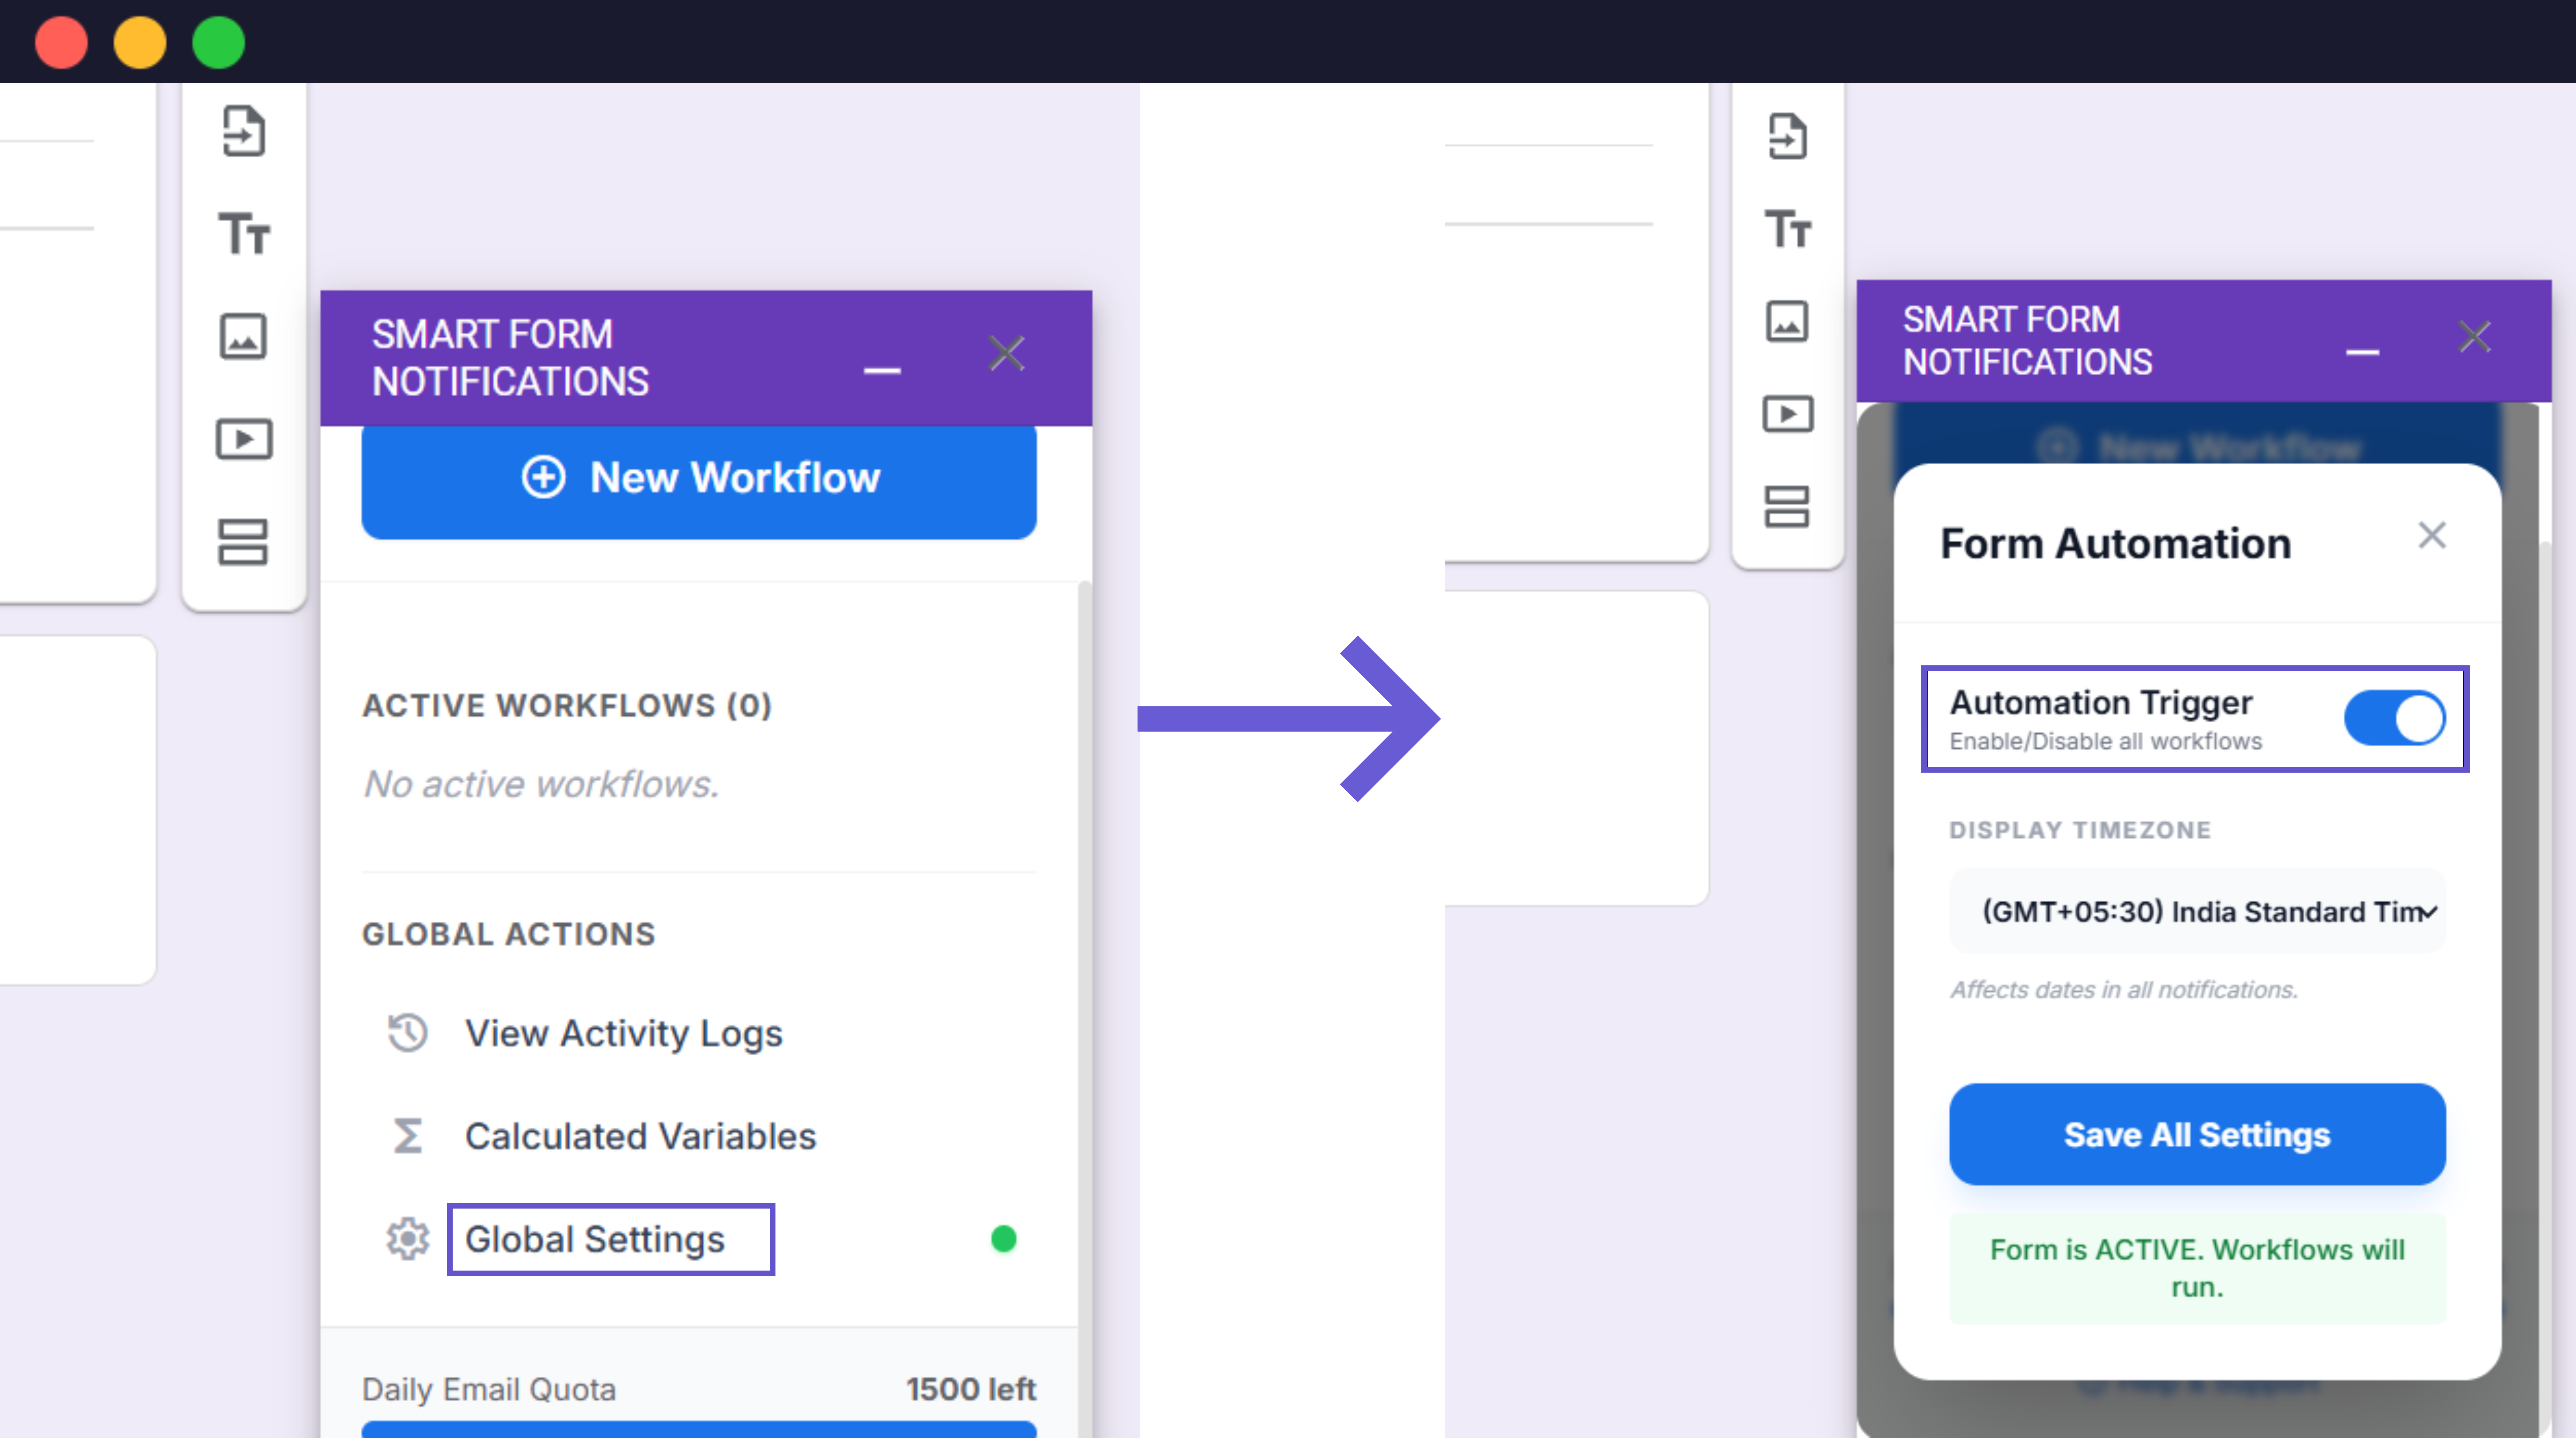
1. Enable the Global Trigger
Activate the 'brain' of the add-on. Without this, the system won't process submissions.
- 1In the sidebar, scroll down to Global Actions.In the sidebar, scroll down to Global Actions.
- 2Click on Global Settings.Click on Global Settings.
- 3Toggle the Active Status to ON.Toggle the Active Status to ON.
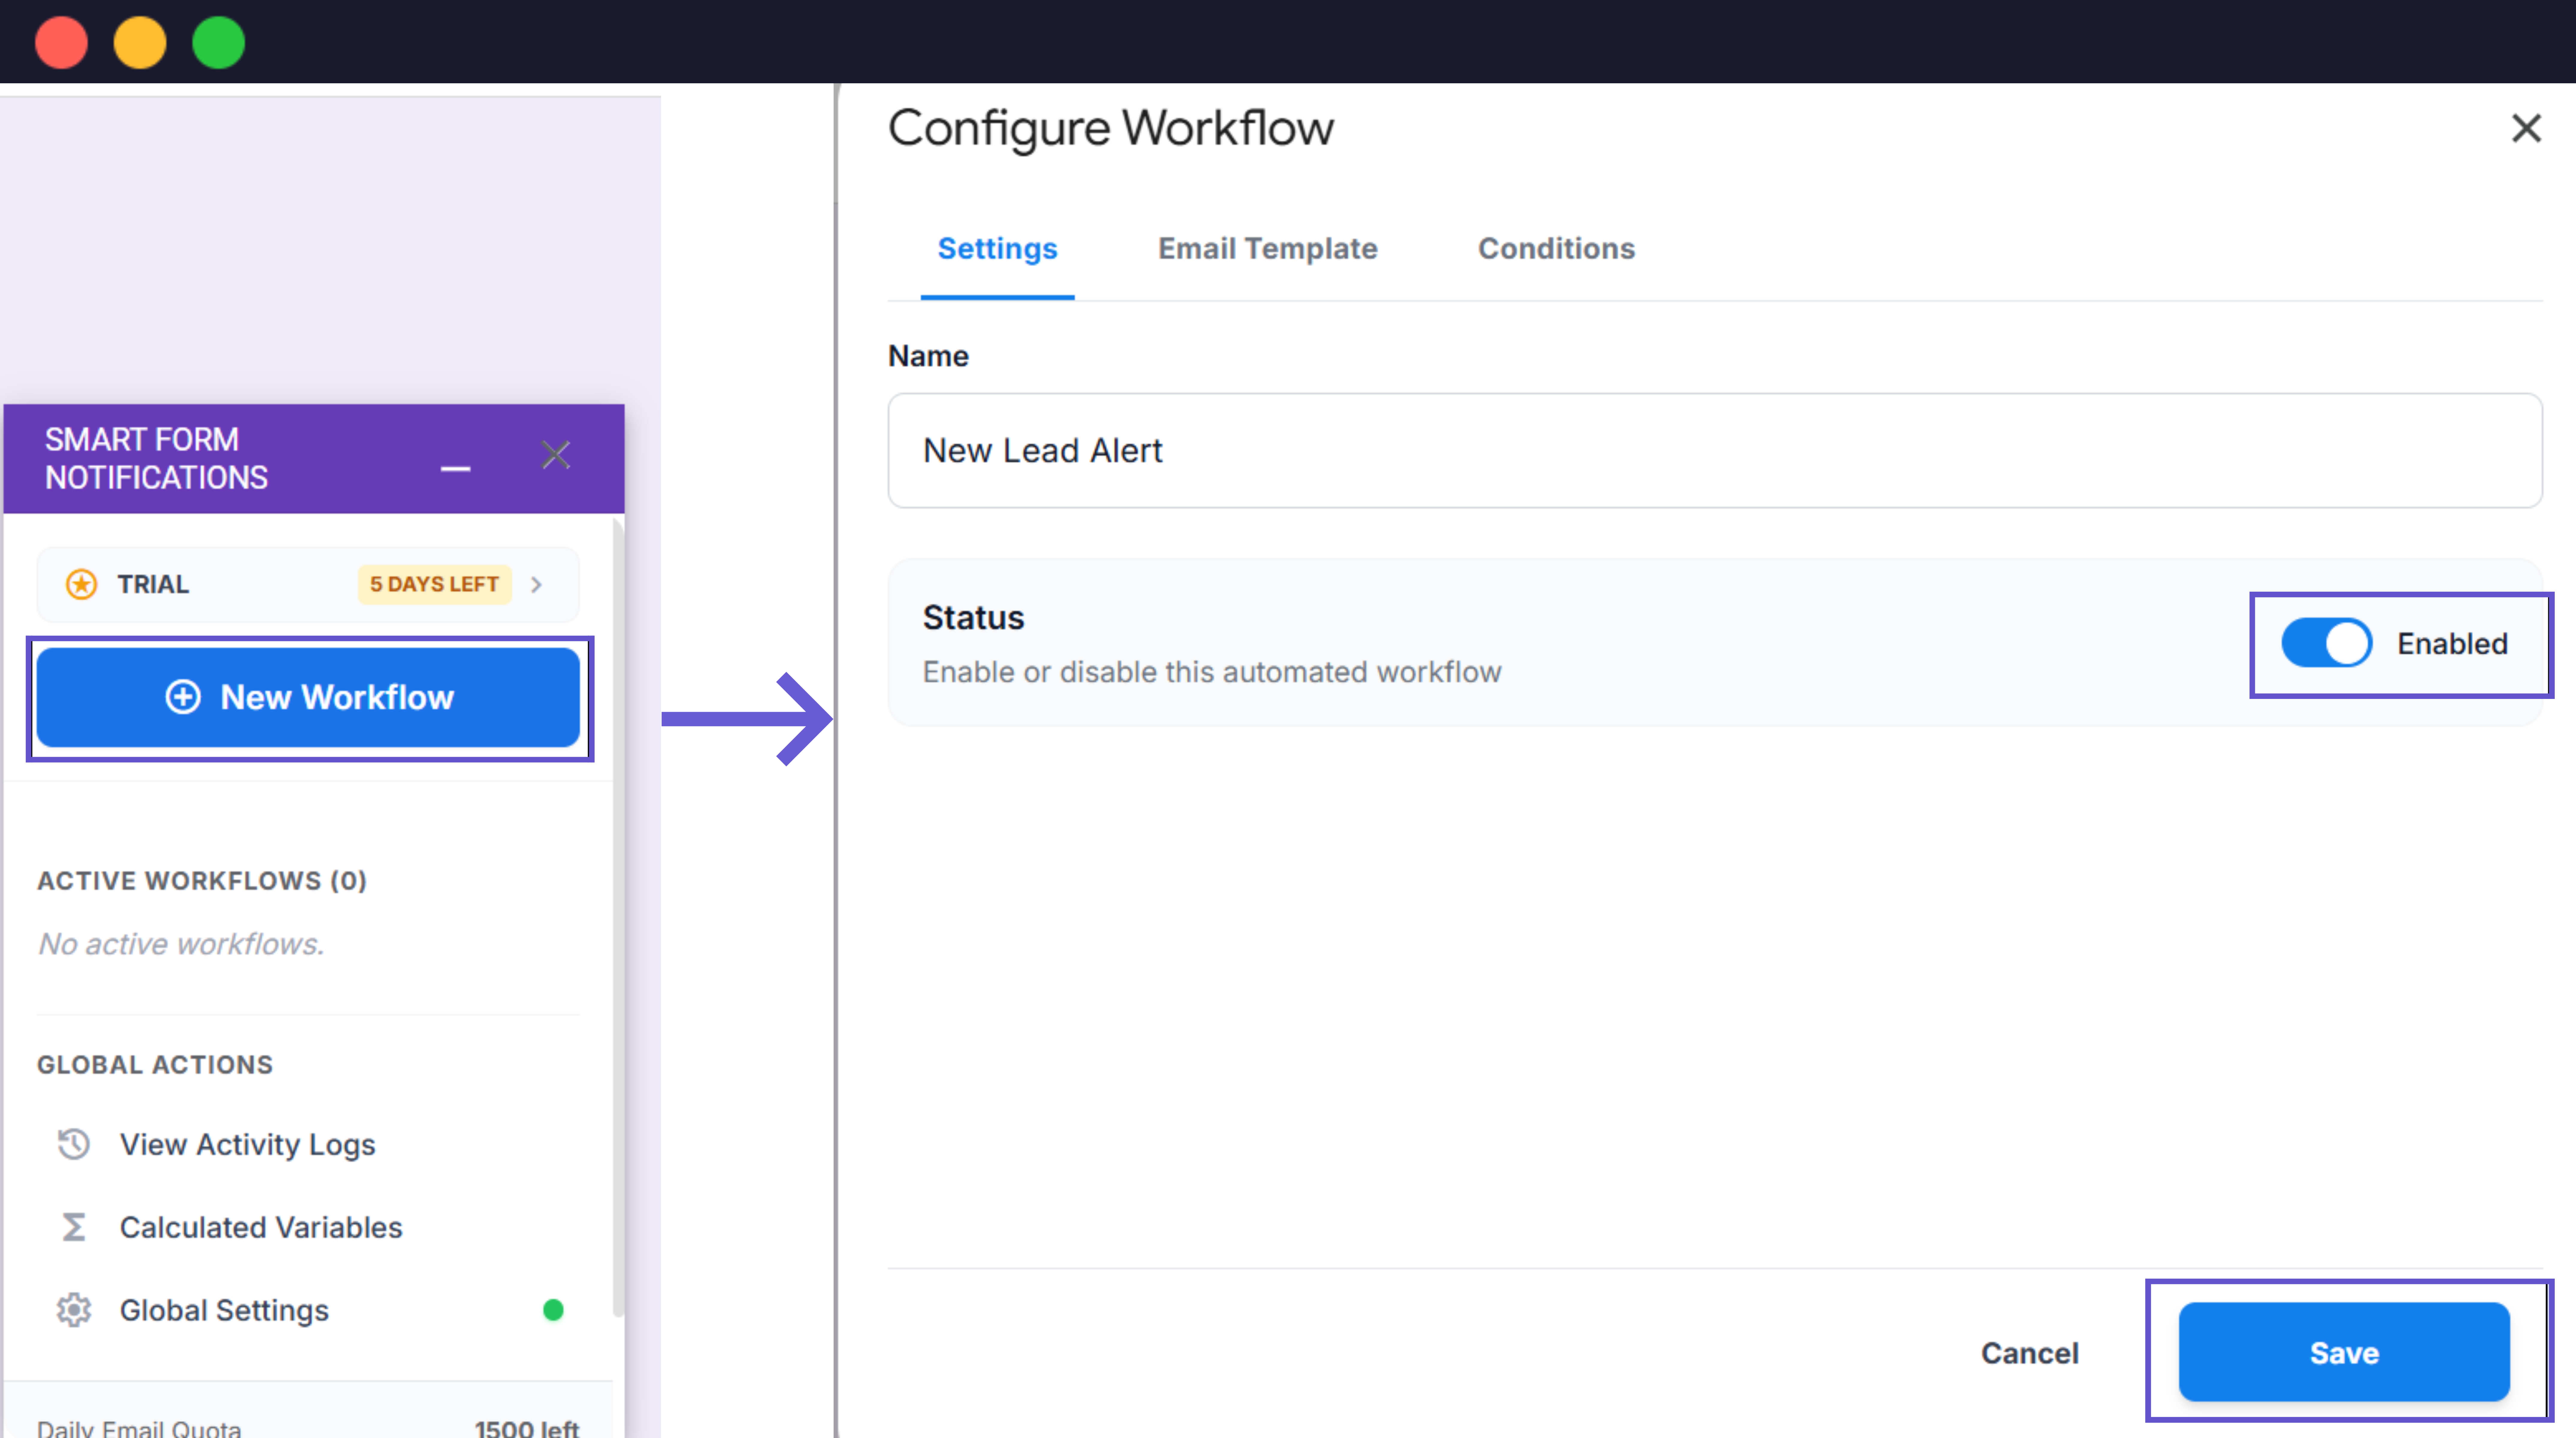
2. Create a New Workflow
Define your set of instructions for each submission.
- 1Click the (+) New Workflow button at the top.Click the (+) New Workflow button at the top.
- 2Enter a Workflow Name (e.g., 'New Lead Alert').Enter a Workflow Name (e.g., 'New Lead Alert').
- 3Ensure the Status toggle is set to Enabled.Ensure the Status toggle is set to Enabled.
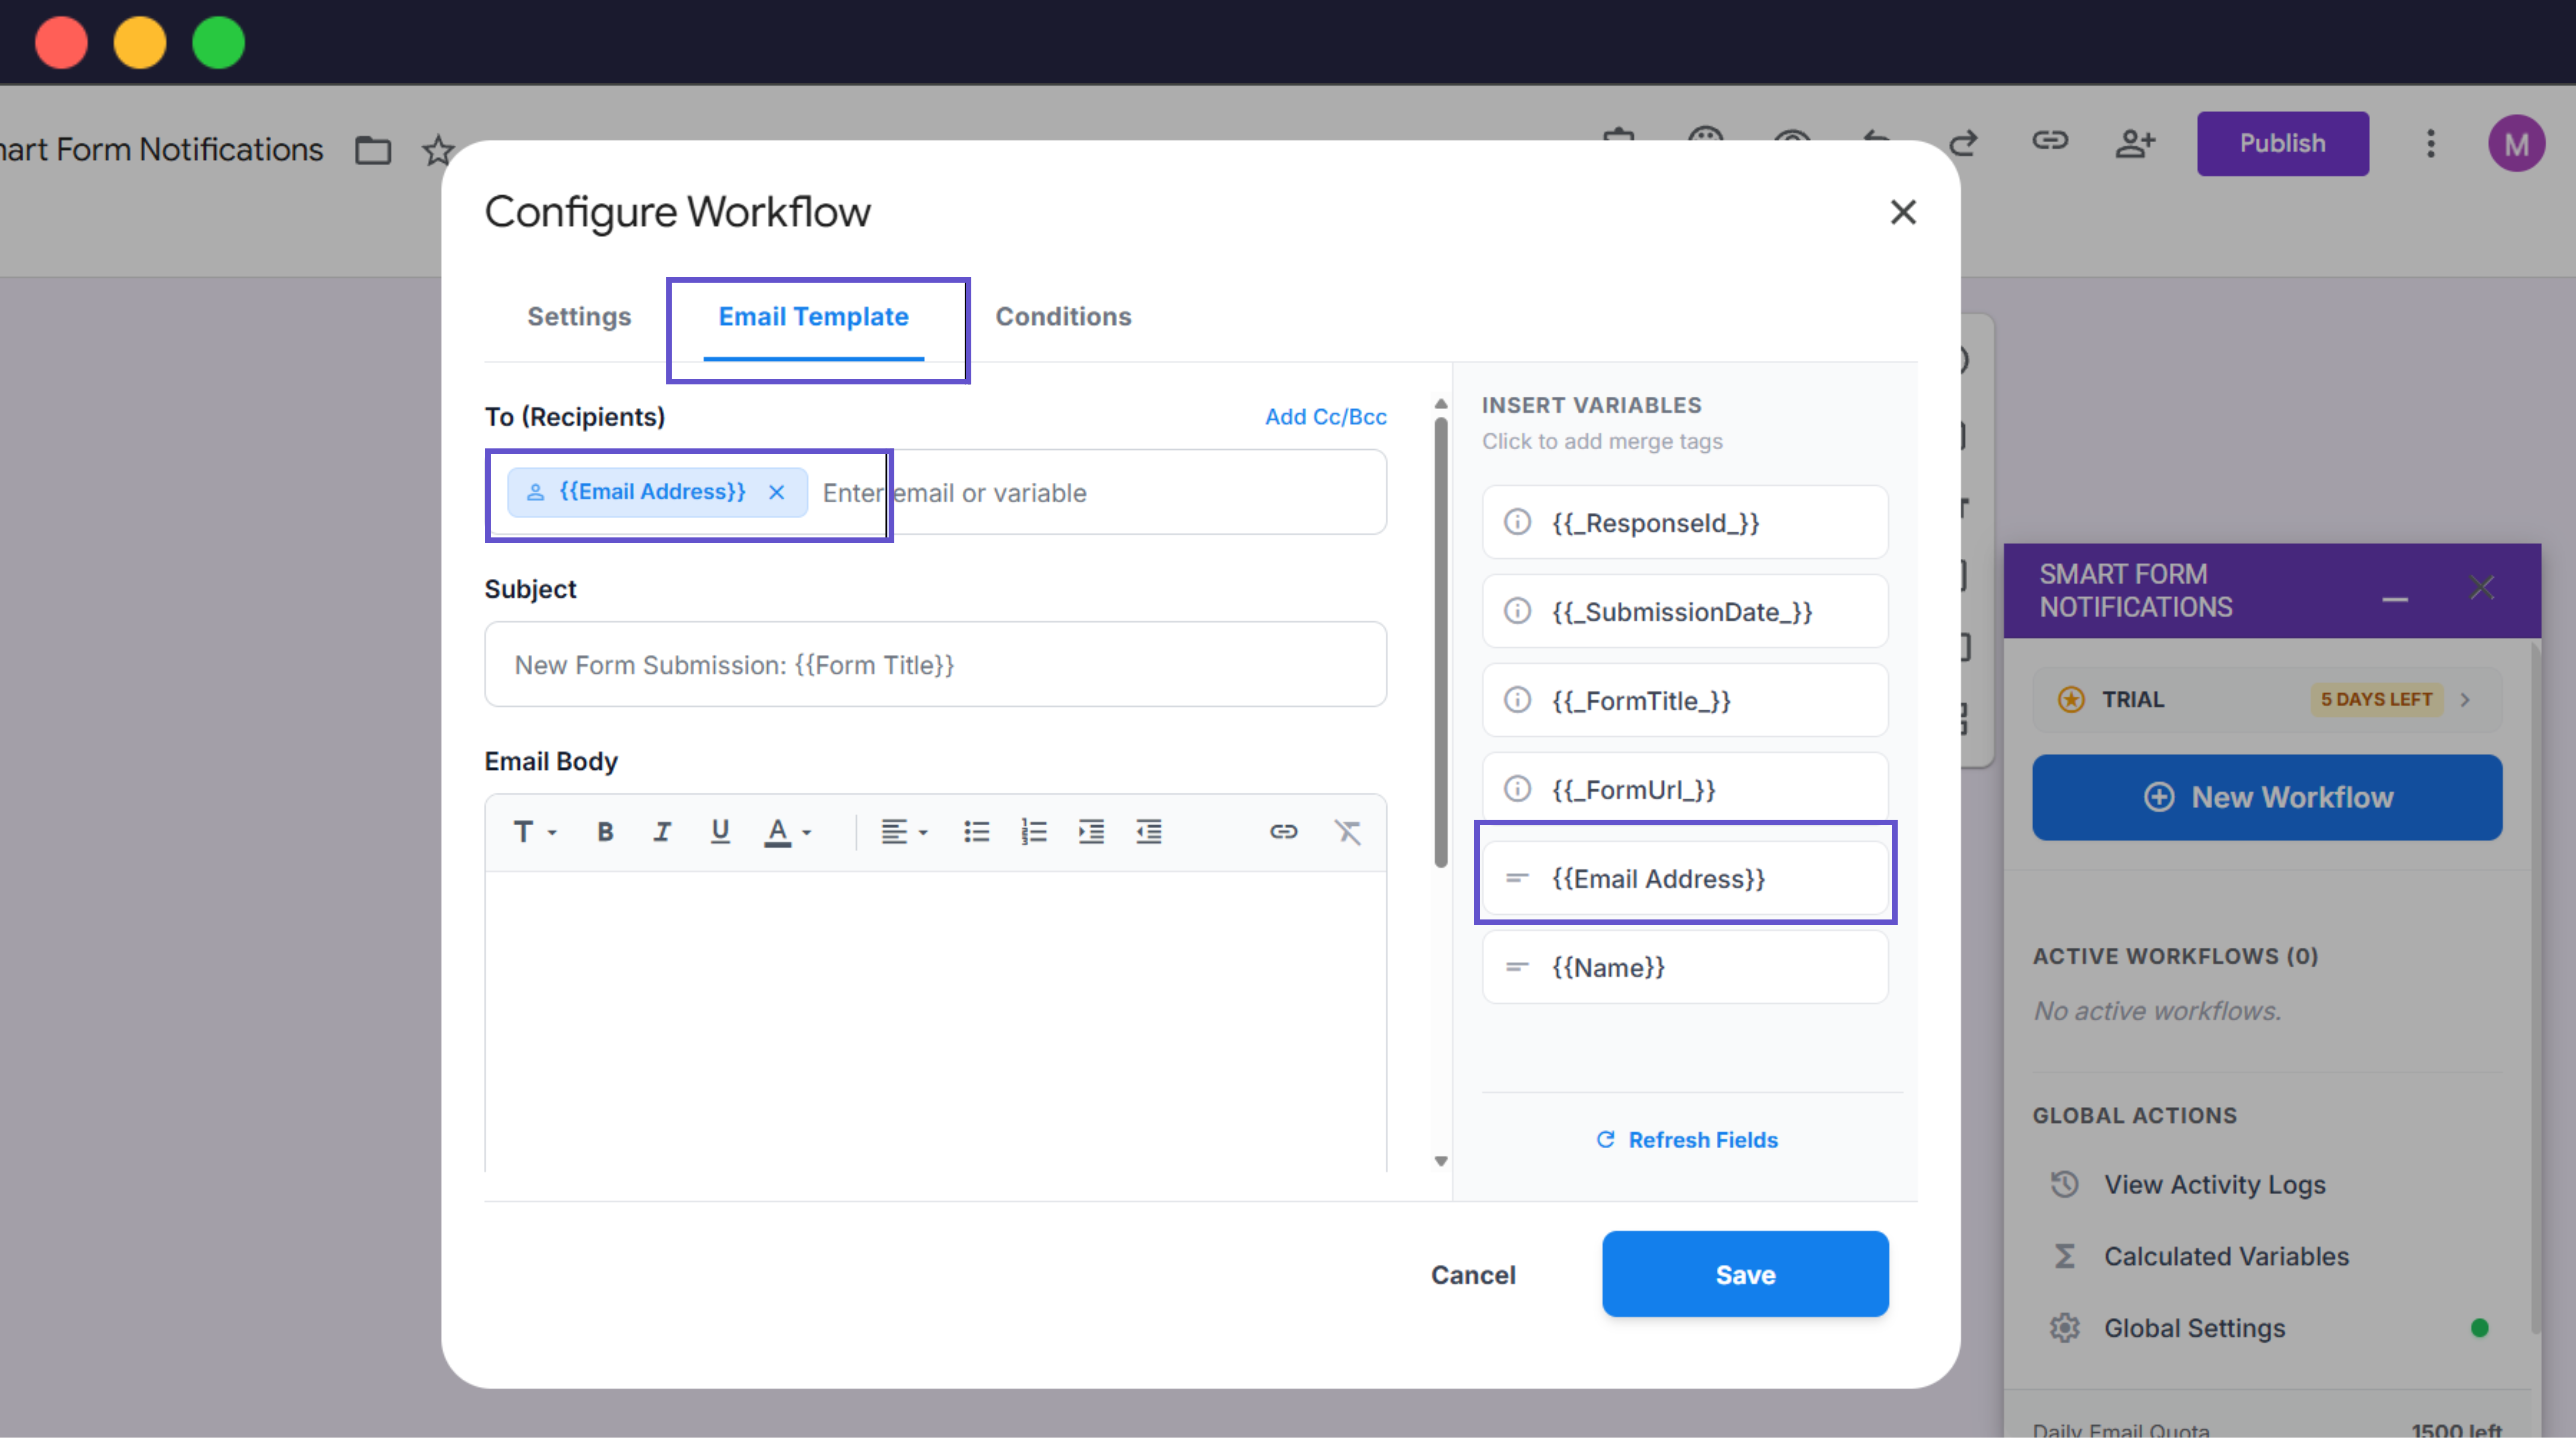
3. Design Your Email Template
Customize what the recipient sees using dynamic data.
- 1Switch to the Email Template tab.Switch to the Email Template tab.
- 2Enter the 'To' address (or use {Email Address} marker).Enter the 'To' address (or use {{Email Address}} marker).
- 3Insert Variables from the right sidebar into your Subject and Body.Insert Variables from the right sidebar into your Subject and Body.
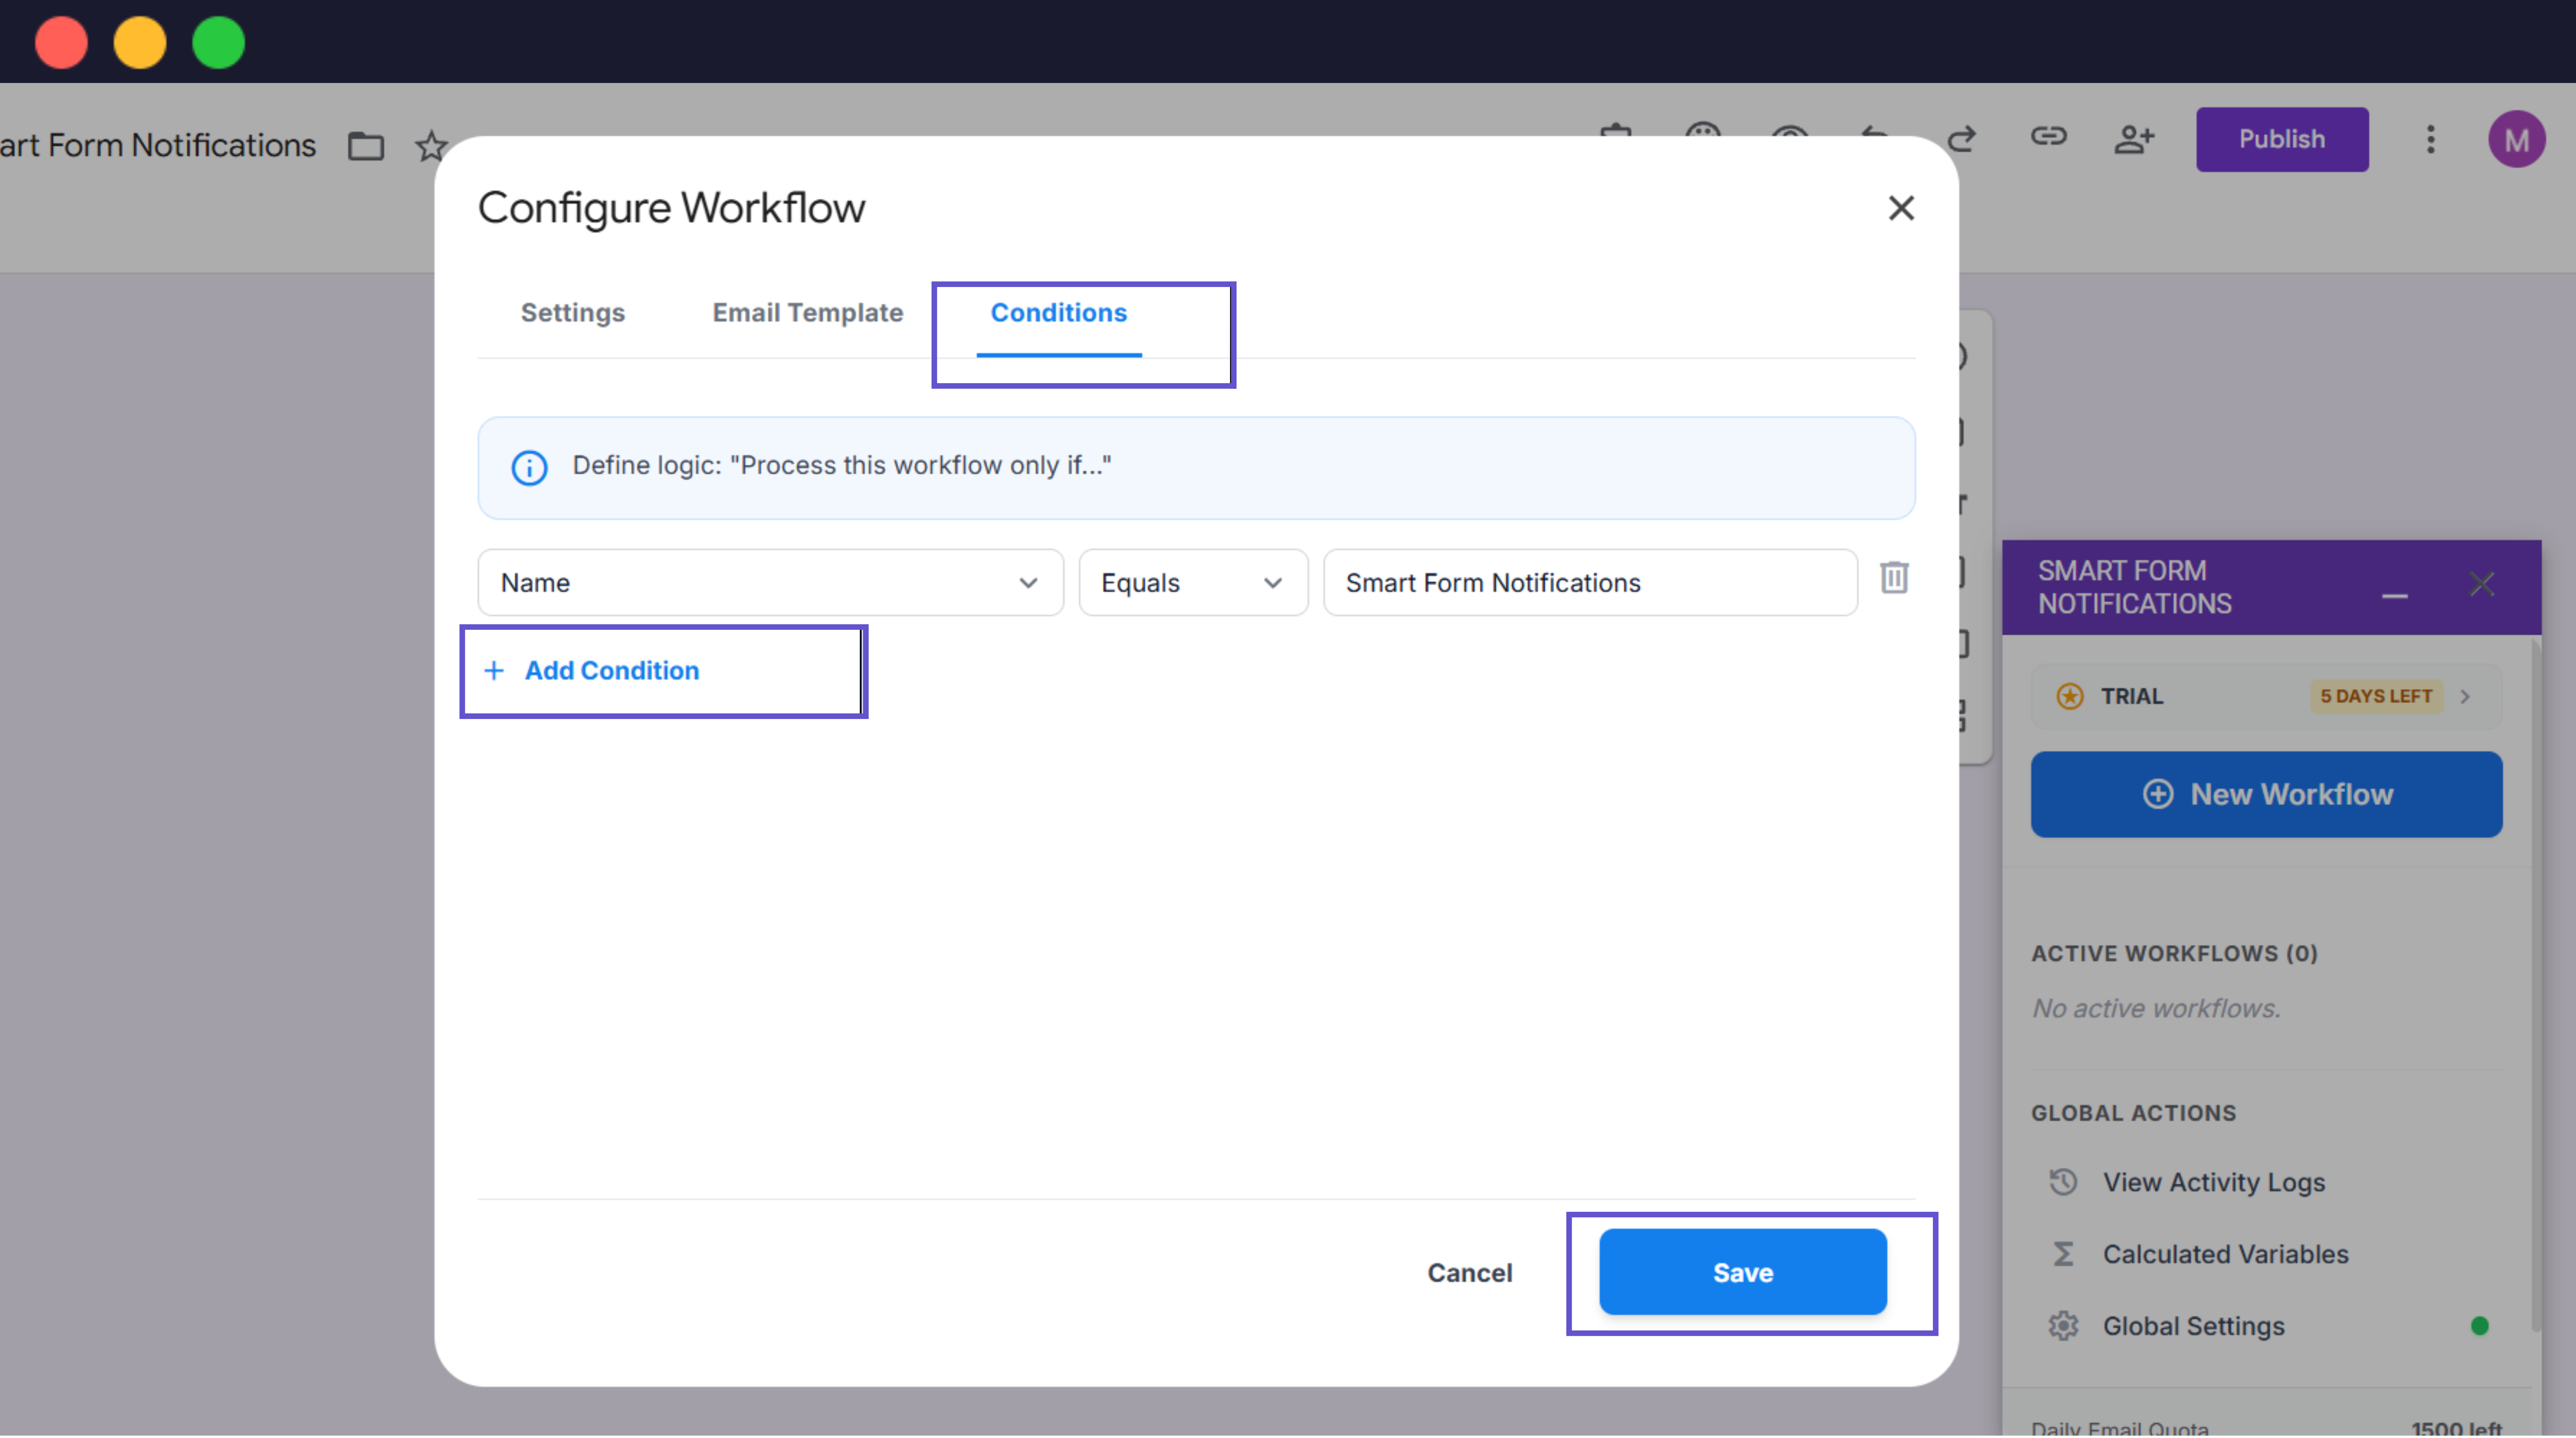
4. Add Conditional Logic (Optional)
Filter which submissions trigger this specific email.
- 1Go to the Conditions tab.Go to the Conditions tab.
- 2Select a question and an operator (e.g., 'Equals').Select a question and an operator (e.g., 'Equals').
- 3Type the value required to trigger the notification.Type the value required to trigger the notification.
5. Save and Test
Verify your setup with a real form submission.
- 1Click Save Workflow at the bottom.Click Save Workflow at the bottom.
- 2Open your Google Form in 'Preview' mode.Open your Google Form in 'Preview' mode.
- 3Submit a test response and check your inbox.Submit a test response and check your inbox.
Next Steps & Tips
Scaling Up
Need more workflows? You can create multiple workflows for the same form (e.g., one for the admin and one "Thank You" email for the user).
Daily Limits
Keep an eye on your daily email limit shown at the bottom of the sidebar to ensure you don't run out of credits.