Email Settings
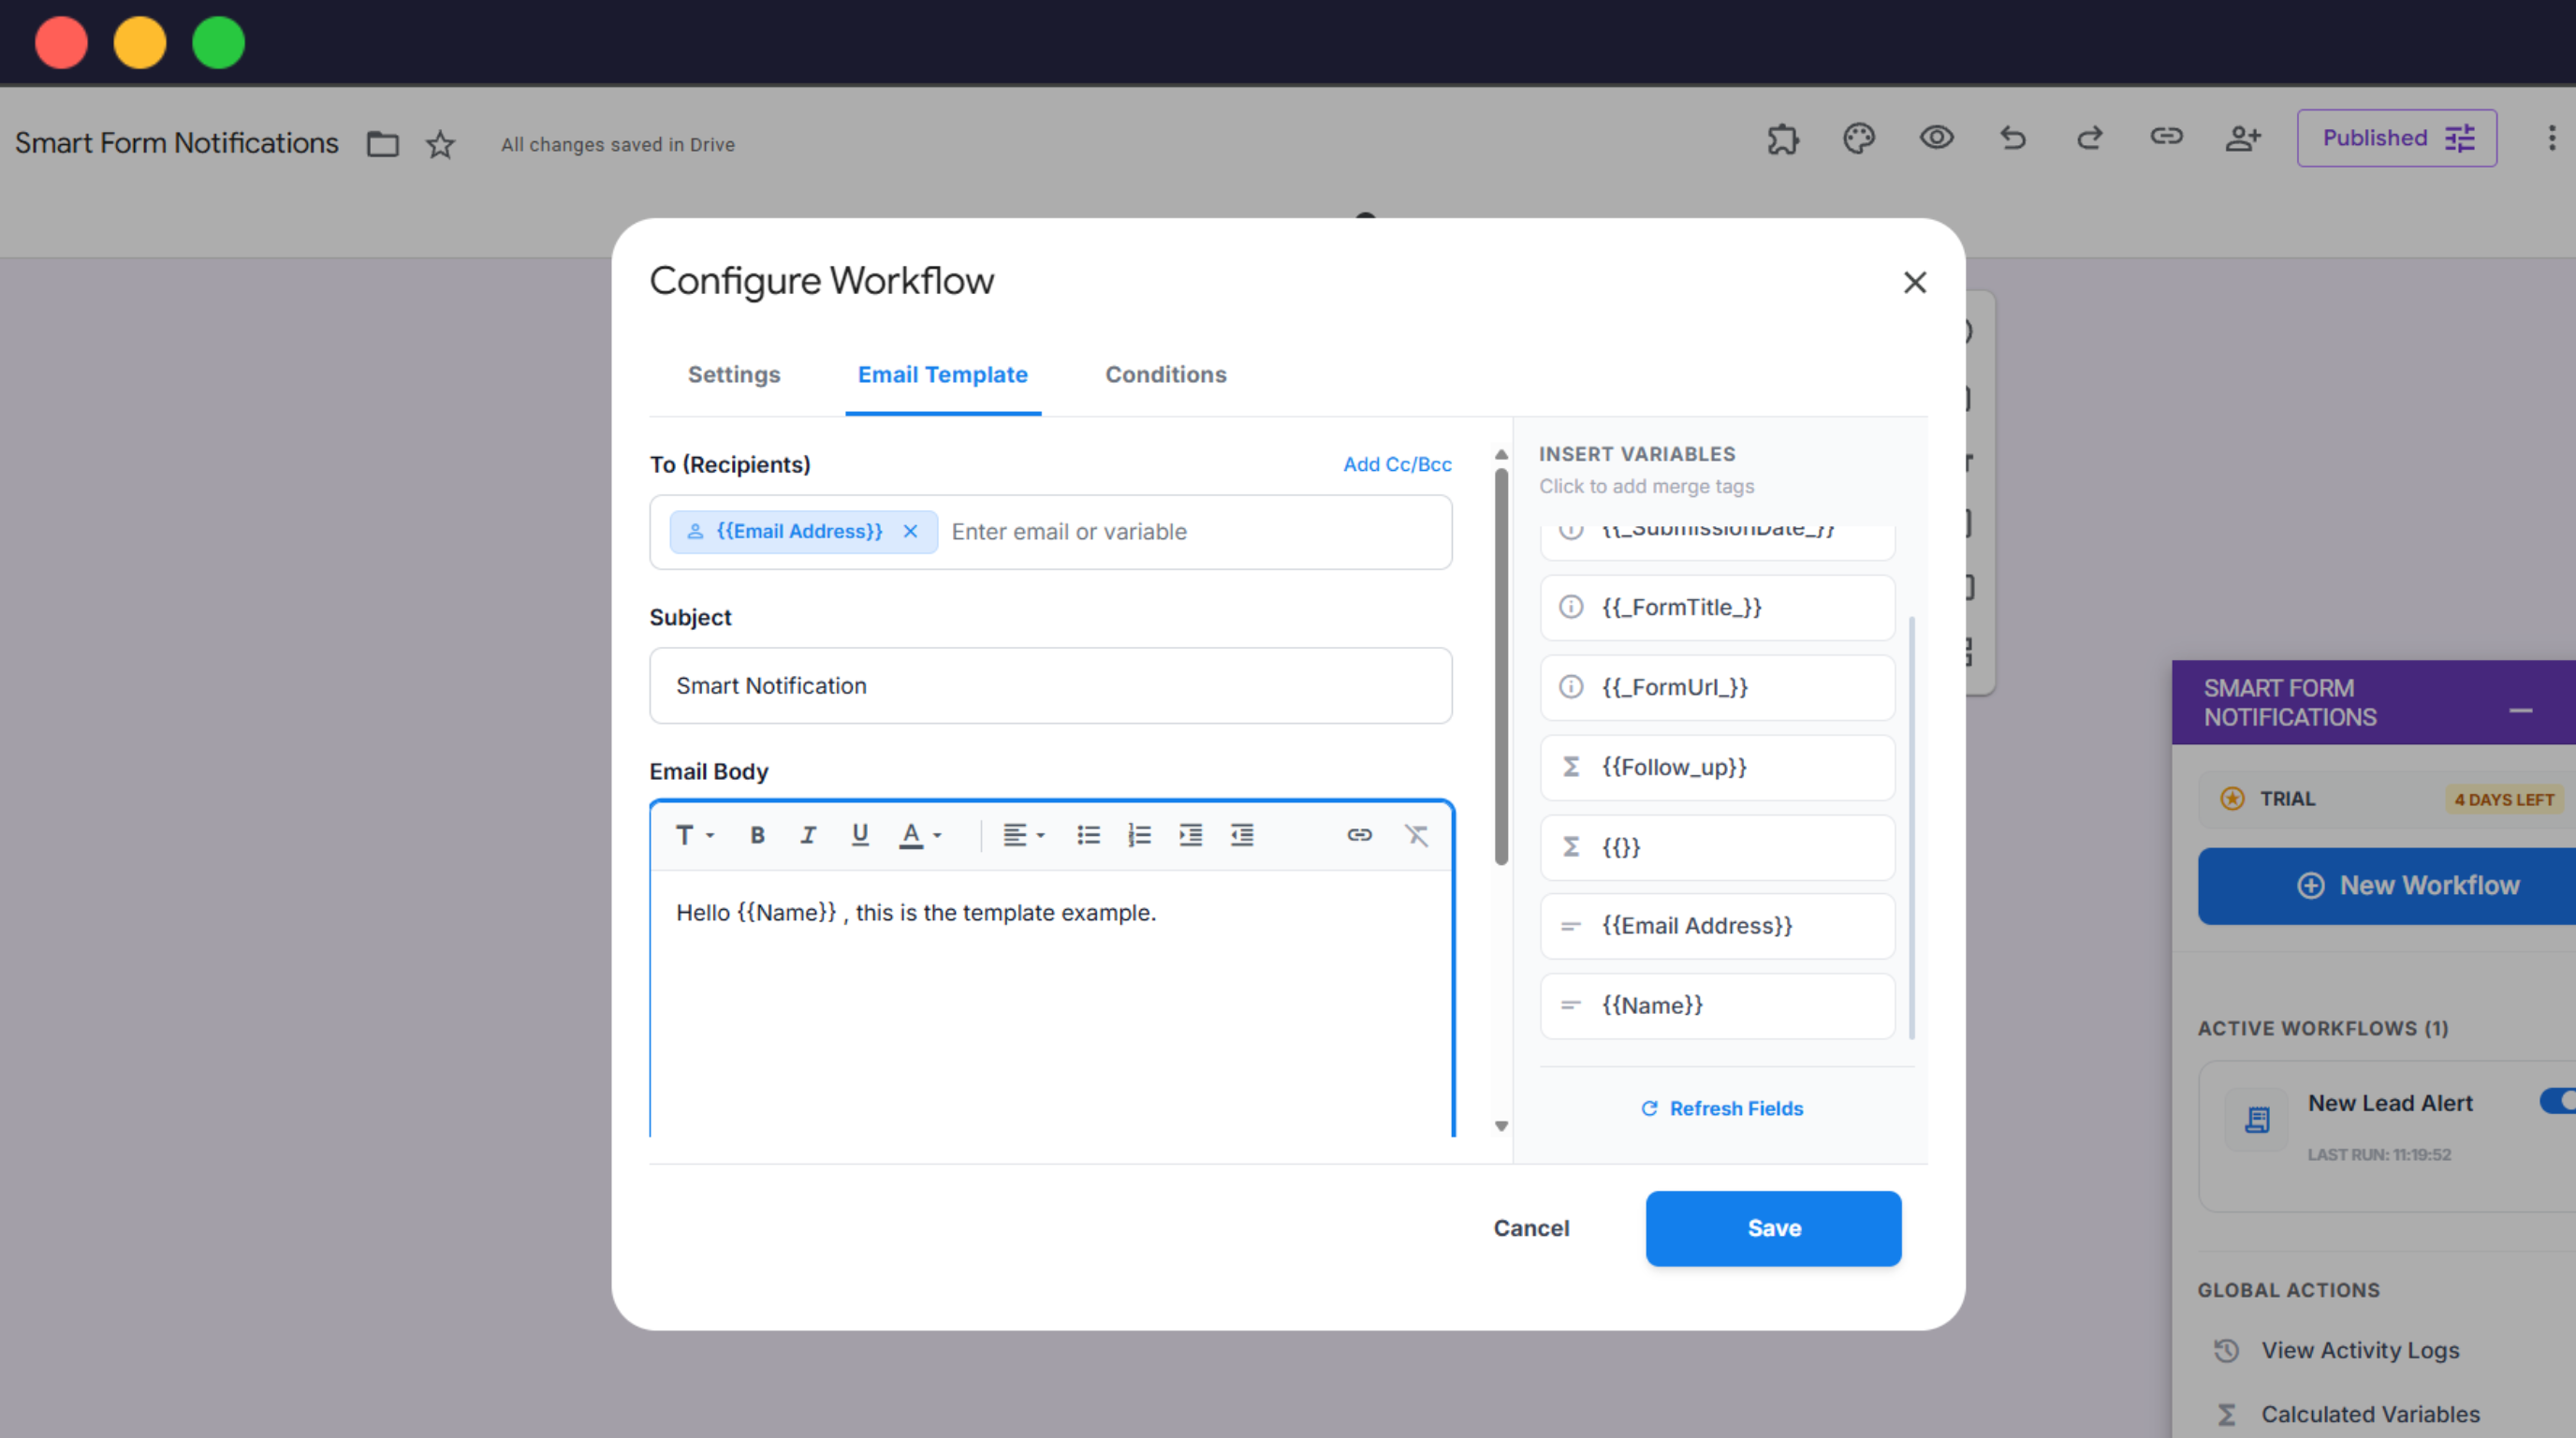
The Email Settings tab is where you define the destination, subject, and content of your automated notifications. Turn your workflow logic into professional communication.
1. Recipient Configuration (To)
Choose how the destination of your automated notifications is determined.
Static Recipient
Type in a fixed email address (e.g., sales@company.com) if you want the same person notified every time.
Dynamic Recipient
Click on a Merge Tag like {{Email}} to send the notification directly to the person who filled out the form.
2. Subject Line
The subject line is the first thing the recipient sees. You can make it dynamic by inserting variables.
Live Example
New Support Ticket: {{Priority}} - {{Name}}3. The Email Body
This is your workspace for message content using the Rich Text Editor.
- Format Text: Use bold, italics, and lists to make the information readable.
- Brand Your Email: Add logos, signatures, and links to external resources.
- Insert Form Data: Use the 'Insert Variables' panel on the right side of the screen. Simply click a variable (e.g., {{Phone}}) to place it anywhere in your message.
4. Advanced Options
Take your notifications further with automated file handling and custom footers.
File Attachments
If your form contains a 'File Upload' question, ensure the 'Attach Files' option is enabled. The add-on pulls files from Google Drive automatically.
Custom Signatures
Save a standard footer or signature to be reused across different workflows for a consistent brand feel.