General Settings
The General Settings panel is the "engine room" of Smart Form Notifications. This is where you control the global behavior of the add-on.
Accessing General Settings
- 1
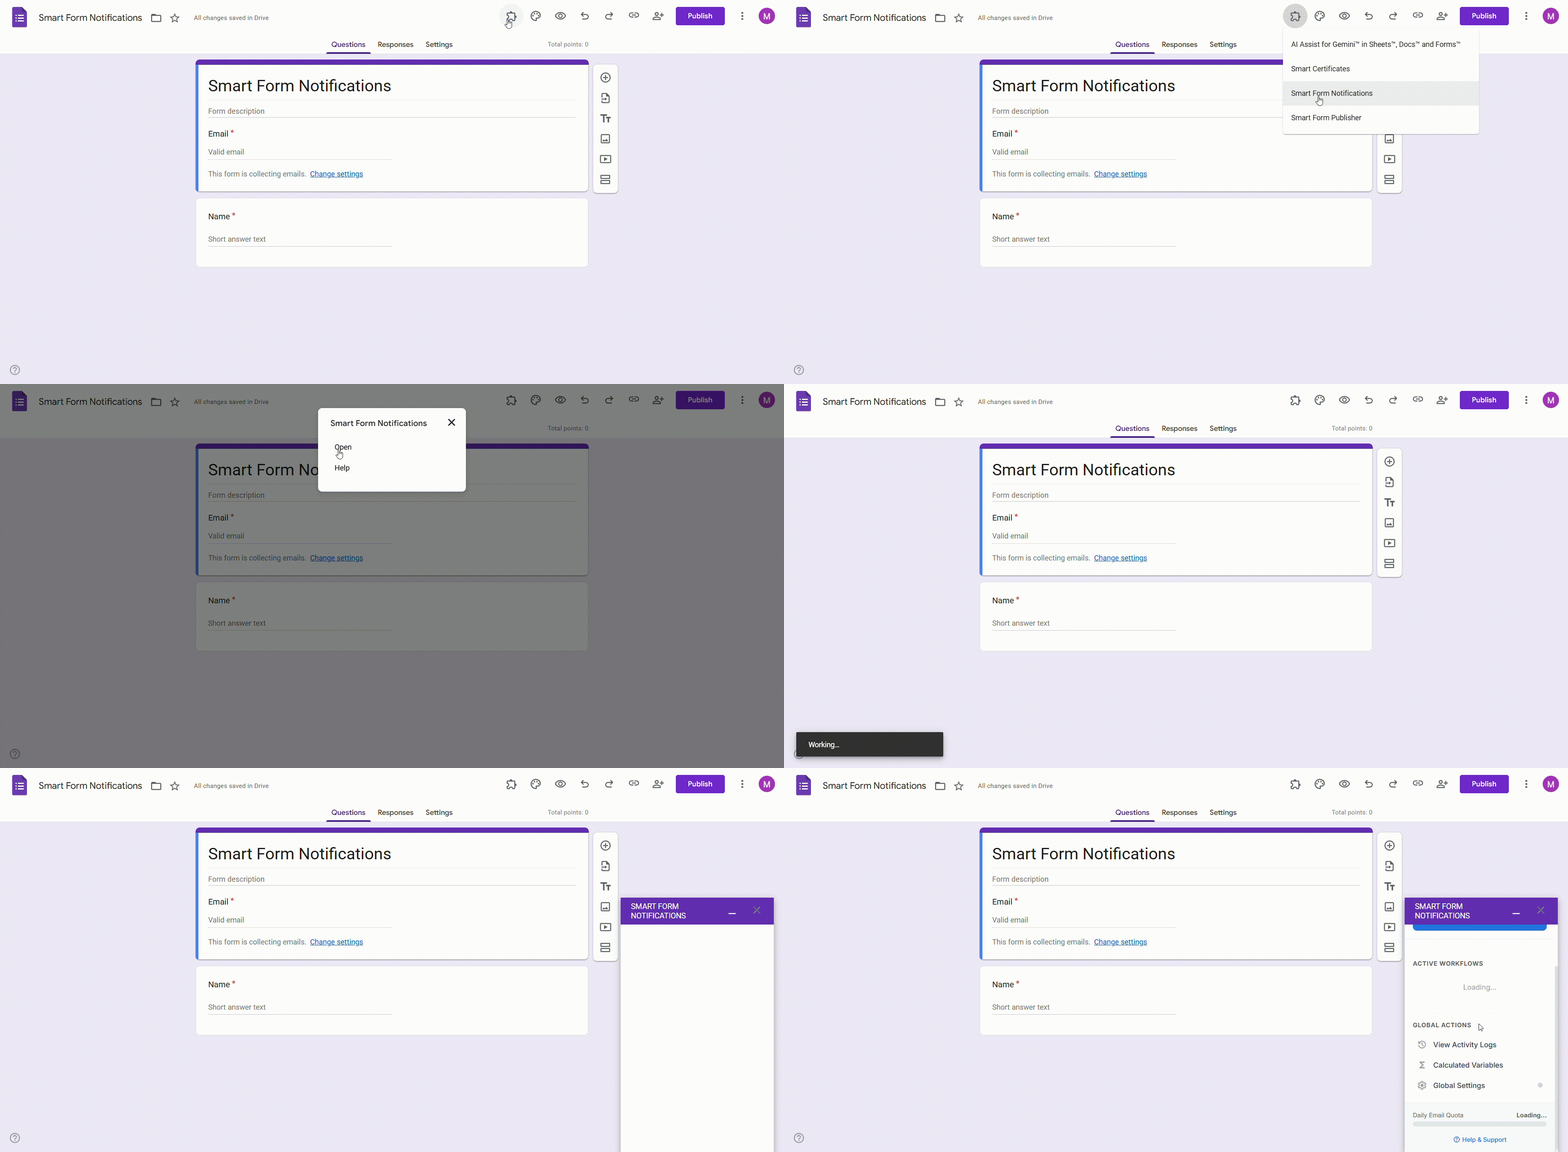
Open the Smart Form Notifications sidebar.
- 2
Scroll down to the Global Actions section at the bottom.
- 3
Click on the Global Settings button.
1. Form Automation Trigger
The most critical setting is the Active Status toggle.
OFF (Inactive)
No workflows will run, even if they are individually enabled. Use this if you want to temporarily pause all notifications.
ON (Active)
The add-on is now 'watching' your form. Every time a respondent clicks submit, the add-on will check your workflows and send emails accordingly.
2. Global Execution Status
When you toggle the automation to ON, you should see a confirmation message.
If you see a red warning message, it may mean the internal Google trigger was not created successfully. Simply toggle it off and back on again to refresh the connection.
Quick Preview: Opening the Sidebar
Watch this quick visual guide to see the automation in action.
3. Managing Multiple Workflows
In General Settings, you can see an overview of how many workflows are currently tied to this specific form.
Free Users
You are limited to 1 active workflow.
Pro Users
You can manage unlimited workflows from this dashboard.
4. Error Notifications
Within the settings, you can configure how you want to be notified if a workflow fails (for example, if you run out of email quota). Ensuring your own email is set as the "Error Contact" helps you stay on top of any technical hitches.